


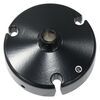
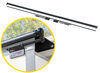
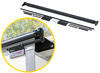
If your RV already has Solera wall brackets, these adapters let you use them. They slide over the existing brackets and secures with two set screws, so you can install an etrailer slide topper without removing factory hardware or drilling new holes.
Many RVs come with factory-installed Solera brackets already mounted to the wall. These two adapter brackets slide over those existing Solera mounts and secure with two M6x12 set screws on each bracket. They allow an etrailer slide-out topper to use the original mounts instead of removing them and drilling new holes into your RV wall. If the brackets are already in place and sealed, there's no sense making new holes just to solve a problem that doesn't exist.
Videos are provided as a guide only. Refer to manufacturer installation instructions and specs for complete information.
Hey there, neighbors. Kevin here with etrailer. And today we're gonna be taking a closer look at and showing you how to install the Solara Adapter Brackets for etrailer Slide Toppers. Sora is a giant name in the RV industry and their brackets for all of their slide toppers are pretty much coming already pre-installed on RVs nowadays just because most people are buying them aftermarket anyway. So if you're wanting to throw on an etrailer awning, that's gonna be a little bit of a problem with the bracket style that we have. That's where this adapter plate is gonna come into play.
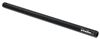
It's gonna be able to match up to the hex rod that's gonna come with your etrailer awning, but then it's also gonna have the correct kind of pattern to match up to the bracket that comes from Solara. So all you have to do is pop off that cover and then install your etrailer awning like you would normally with a Solara one and you can pop that on just like you would with the Solara awning without having to have that specific part. Now if you don't wanna use yourself, you're looking at this and saying, "Ah, that's a bit more than I wanna do. I don't want to get up on the ladder, I don't wanna get up here and try and mess with that at all. Let's have somebody else do it," then you're in luck.
We have an installer locator you can click on and just enter in your zip code to find a shop near you and get it professionally installed. Now to determine if our current extrusion rail is gonna be good enough or not, there's a couple of measurements you can kind of take to just see what's gonna work for you because we do really want to be able to use those Solara brackets since we have the adapters to make our install a whole lot easier. Well, starting out we're gonna go from the center of our roll tube, which is this pin that's going into it with our arm down to our connection point. So the center to center of that up to basically this bracket where it's gonna live. So from there to there it's 3 1/2 inches.
So what we need to then determine is, is that mounting bracket going to give us the right amount of gap between that and then the extrusion rail to match up with our two sets of holes that we can use. So from the center of that hole down to the first set of holes is gonna be right around 2 inches. So that's telling me I've got about 3.5 plus 2 inches, so roughly 5 1/2 inches of space. If I wanted to go a little bit further, maybe go into that second set of holes, that's gonna be roughly an extra inch, maybe an extra 1/8 of an inch more. So then you're looking at more like 6, 6 1/2 inches.
So what we can do from there is go hold this up onto the bracket that's out there, that Solara one, and then measure up from the center of this guy down here, the connection point for our rod up to that extrusion rail to make sure that that is gonna be something that's gonna be doable with the bracket, how it currently stays. So let's walk out there, we'll take a quick measurement, make sure it's gonna be good. If so, I'm gonna throw the poly cord into the backside of our fabric and we can start prepping up our brackets to get those put in place. All right. So we're up at our trailer here. We've got our extrusion rail, we have our mounting bracket. We're gonna be popping off the cover for that Solara one and I'm just gonna slide this on in the lower position. Oh, there we go. Really tight fit. And that is exactly how we want it to be. So we don't want this moving around on us. Now I know it's a 3 1/2 measurement from the extension rod up to the center of our roll tube. So from there, I can measure up 3 1/2 inches. So this is the center of my roll tube. From here up to the center of that, I'm only getting 2 inches, so that's not gonna gimme that 3 inches that I need. So this would need to actually sit just a bit lower, which is pretty typical whenever we're actually mounting the brackets up because we wouldn't usually put it on the T molding. We would put it right up in this upper corner and then we would have the adjustment between the two levels if this was like a Solara one, but in our case, we are gonna have to kind of have this sit just a little bit lower so that way we can have it get that correct slope to it. So we debated back and forth on how we wanted to get this right so that way we're getting that 3 inches of slope and unfortunately the only way to do that really is gonna be just removing our extrusion rail and then adjusting it to the right height for it to sit that way. Now we did talk to our neighbor, he does not wanna move it. He is fine with just having the 2 inches of slope and trying it out. And if it is an issue we can always take it back down and get it fixed and redo all that. But if it's gonna be good enough just with how it is right now to where he is getting a decent enough slope, he's just gonna stick with that just to avoid putting some more holes in the trailer, which you'll probably find the same for you too just because if you have to remove this, it's a ton of screws going down it, you got sealant you gotta remove and it's just not gonna look as good as it once did. So now that we've decided we are gonna stick with these brackets, we are gonna go ahead and use the ones that adapt to the Solara brackets. It's time to go back inside. We're gonna put our poly cord through, it's gonna connect up to the C channel here. And then we can also get our extension rods bolted in place. So next we're gonna be installing our hex rod. This is gonna mount up into the arm. You'll see there's already a pilot hole. We're gonna be drilling that bigger and we're gonna be drilling through the hex rod before we put our self-tapping screws in. Now there's 12 points on this. So like if you we inchesre thinking of this like a socket, there'd be a six point or 12 point. Well, 12 point allows you to turn this different ways and we don't want this to turn at away where we're gonna get the edge of it or the corner lined up with our hole. We want the nice flat side there so we have something easy to drill into. So make sure that you are putting it in there correctly. You're fully seating it in. So like I've got it pressed up all the way up to the edge of the inside here. And we're gonna take a 7/32 drill bit. We're gonna drill through not only the arm but also into our hex bar here. So, now I'll take the 1/4 inch self-tapping screw, include it in our kit and we're gonna run that through. (drill whirring) Be careful, you want get it just until it stops. If you keep trying to turn it past that point, it's gonna wanna rip that head right off because you're putting way too much tension on the head of it as you start going through these thicker metals here. So just repeat this process over on the other side and then grab your brackets. It's gonna be time to put this up on the trailer now. So now we're gonna be sliding our fabric into our extrusion rail. And one thing I like to do is take my needle nose pliers and on the tip of it I'll kind of bend it out a little bit more so the opening's a little bit wider, gives it a little bit easier of a transition in. So grab your bead, start slotting that through and I've got three ladders set up. I've got a guy behind me, guy in front of me, so that way we can kind of hand it off and leapfrog each other to get this awning in place. All right. From there I'm gonna get my bracket lined up and I'm gonna go with the top hole on here so that way we have this sit a little bit lower, we'll get more of a slope. But I'm slipping it on. It's a little hard to see with the fabric anyway, but I'm slipping it onto the extension rod at the same time that I'm trying to slip it into this Solara bracket here. But you get have it perfectly lined up 'cause there's very, very, very tight tolerances on this, kind of pinching a little bit. I'm gonna grab my rubber mallet, I'll give it a couple love taps. We'll get that to fully come over. All right. I got that nice And even. Now we'll grab our set screw. And then from there we can kinda shift this back and forth 'cause like we talked about at the beginning of the video, there's gonna be a little bit of a lean more towards this side just because we have that other awning so close to our slide out over at the right side here. All right. I got my little set screw. It's gonna be these guys. You'll see four of those in the kit. And these are gonna require a 3 millimeter Allen key in order to install. Now, we'll get those threaded in. That's nice and snug. And we'll get our second one in and then we can switch over to our other bracket. All right. Now we would wanna move this around and get it centered. We've done that so far. We have it to where the fabric is just really winding up with the box, not really interfering with our other awning over there. We actually came out pretty pretty good. So once again, we're gonna take that 7/32 drill bit. We're gonna be drilling through our bracket here and then into our hex bar. And we're gonna lock that in place with some more of those self tapping screws. I got that one in just to kind of lock it in place so it doesn't move on me while I'm drilling the other one. Now once you get both of those brackets anchored up to your extension rod, it's now time to pop out the little cotter pin that is securing the spring here. And while you're doing, you'll want to grab onto the roll tube and roll it towards the trailer. That'll kind of release the tension on it. You can then pull it out. Now this isn't gonna spring out just yet 'cause I still have to get the other side. So I'm gonna walk over there. I'll get that real quick. You'll see this start to wind up real tight. So now, for our next part, we're gonna be running the slide out in and out a couple of times. The fabric is still a little loose because it's not secured into the extrusion rail yet. So what we're trying to accomplish here is, try to work out any wrinkles that we might have by opening and closing it, and then also kind of pulling on the fabric itself and kind of stretching it outwards in the extrusion rail so we can get that nice and tight. Then we're gonna have some self-tapping screws. We're gonna drill through that extrusion rail right into that bead that we put through the fabric that's gonna lock it in place. So I'm gonna run this in and out a couple times. We'll see how it looks, see what we need to adjust and if we need to work any more wrinkles out. That's gonna do it for our closer look at the Solara adapter brackets for etrailer RV slide toppers. My name's Kevin. Maybe you still have some questions about these brackets and how they're gonna be hooking up to your Solara Pre-installed Slide Topper brackets, then please feel free to reach out to us via our Ask The Experts link or comment on this video or phone call to our customer service department and we'd be happy to help you out on your journey.
Customer Satisfaction Score:
99% were satisfied with this product
1% of customers were not satisfied
Ratings & Reviews

Perfect fit. Worked great
Worked just as expected
Easy to co
Worked as designed with the factory solara brackets on my trailer
Excellent customer service and excellent product. I will order again when I need something.
Work great if the slide topper bracket bars fit. I bought three slide toppers off Amazon, two from one vendor and one from another (same color wasn't available for one). The two toppers had the right size bars for these adapters. the other topper's bracket bars were two large to fit, so had to remove the Solera brackets and use the ones that came with the topper.
Do you have a question about this Accessories and Part?
Info for this part was:
At etrailer we provide the best information available about the products we sell. We take the quality of our information seriously so that you can get the right part the first time. Let us know if anything is missing or if you have any questions.


















Thank you! Your comment has been submitted successfully. You should be able to view your question/comment here within a few days.
Error submitting comment. Please try again momentarily.